How to Install Straight Fence Posts: A Step-by-Step DIY Guide
———
How to Install Fence Posts Quick Summary
Most residential fence posts are spaced 6–8 feet apart
Fence posts should usually be buried about one-third of their total length
Post holes should typically be 2–3 times wider than the post
Gravel for post-hole support improves drainage while concrete adds extra stability
String lines and levels are essential for keeping fences straight
Soil conditions can affect how deep and wide your post holes need to be
Slowing down during layout and leveling helps avoid future fence problems
A fence might look simple once it’s finished, but the entire project depends on how well the posts are installed.
If the posts aren’t deep enough, level enough, or lined up correctly, those problems usually start showing up sooner than people expect. Slight leaning can turn into sagging panels, sticking gates, or sections of fence drifting out of alignment after a couple of Idaho winters.
Whether you're building a backyard privacy fence, ranch rail fencing, or a simple property boundary fence, this DIY guide walks through the layout process, digging techniques, and installation steps that help keep a fence straight and stable long-term.
What Tools Do You Need Before Installing Fence Posts?
Having the right tools ready before you start digging makes the entire installation process easier and much less frustrating.
You do not necessarily need professional-grade equipment for a DIY fence project, but using the right tools helps keep your posts straight, evenly spaced, and properly supported from the beginning.
Basic Fence Installation Tools
Before starting your project, gather:
Post hole digger
Shovel
Tape measure
String line and stakes
Post level
Gravel
Concrete mix (if needed)
Fence posts and fasteners
For larger projects or difficult ground conditions, renting a powered auger can save a huge amount of time and physical effort.
In many parts of the Treasure Valley, soil conditions can change quickly from loose dirt to packed clay or rocky ground. Digging several post holes by hand in those conditions can become much more work than most people expect.
One of the biggest keys to a good-looking fence is consistency. Straight layout lines, level posts, and accurate measurements all work together to keep the finished fence looking clean and uniform.
A fence can be structurally solid, but if the line starts wandering or posts lean slightly, it’s something you’ll notice every time you look at it.
How Far Apart Should Fence Posts Be?
For most residential fencing projects, fence posts are usually spaced between 6 and 8 feet apart.
The exact spacing depends on the fence style, material, and panel system being used.
Wrought iron fencing spacing can vary depending on panel size, rail design, and overall fence height
Before digging holes, always double-check the recommended spacing for your specific fencing materials.
This step seems simple, but it’s actually where many crooked fences begin.
Even being off by an inch or two in multiple sections can slowly pull the entire fence line out of alignment.
How to Lay Out a Straight Fence Line
Start by marking your corner, end, and gate post locations first. These posts become the anchor points for the entire fence line.
Once those locations are marked, run a tight string line between them. That string acts as your visual guide throughout the installation process and helps keep every post aligned consistently.
From there: Measure your spacing carefully Mark each post location clearly Double-check measurements before digging
Fixing a crooked fence after the posts are already set is much harder than slowing down and getting the layout right from the start.
How Deep Should Fence Post Holes Be?
A good general rule for fence installation is to bury about one-third of the total post length underground.
For example, a standard 6-foot privacy fence often uses 9-foot posts, leaving roughly 3 feet buried below ground level.
That extra depth helps stabilize the fence against:
Wind pressure
Shifting soil
Freeze-thaw movement
Everyday stress from gates and fence weight
Post hole width matters too. In most cases, fence post holes should be about 2–3 times wider than the post itself. A wider hole gives concrete or compacted gravel enough space to properly support the post underground.
Fence problems usually start below ground level long before they become visible above ground.
Digging Fence Post Holes Based on Soil Type
Not all soil behaves the same once digging starts.
Some areas around Boise and the Treasure Valley have sandy soil that drains quickly, while others contain dense clay or rocky ground that can make installation more challenging.
Understanding your soil conditions helps determine how much support your fence posts may need over time.
Sandy Soil
Sandy soil drains well and is easier to dig through, but it also shifts more easily.
Because the soil does not compact tightly around the post, slightly deeper or wider holes are often recommended. Concrete can also help add stability in loose soil conditions.
Clay Soil
Clay-heavy soil tends to hold moisture much longer than other soil types.
That extra moisture can create problems during Idaho’s freeze-thaw cycles, especially if water sits around the base of the post. Adding gravel at the bottom of the hole helps improve drainage and reduce moisture buildup.
Rocky Soil
Rocky soil is usually the hardest to dig through, but once fence posts are installed, it often provides excellent long-term stability.
This is where tools like powered augers or digging bars become extremely helpful.
Sometimes fence installation is less about speed and more about working steadily through difficult ground conditions. Doing the job more slowly but correctly can save an immense amount of time, effort, and money in the future.
How to Set Fence Posts Step-by-Step
Once your holes are dug, it’s time to start setting posts. This is the stage where slowing down usually leads to a much better finished product.
Step 1: Add Gravel for Drainage
Pour 4–6 inches of gravel into the bottom of the hole.
This helps water drain away from the base of the post instead of collecting around it over time.
Step 2: Place the Post
Set the post into the center of the hole and check the height against your string line.
Step 3: Level the Post
Use a post level to check both sides of the post.
A post can appear straight from one angle while still leaning slightly another direction, so checking both sides matters.
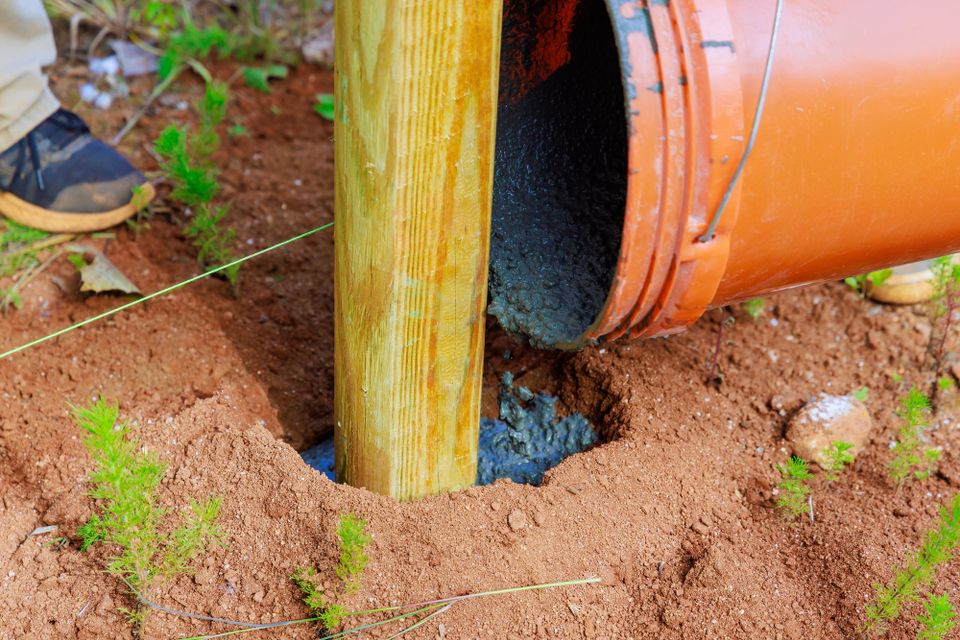
Step 4: Add Concrete or Gravel
Once the post is level, add your support material around the base. Concrete works best for:
Corners
Gates
Heavy privacy fencing
High-wind areas
Packed gravel works well for lighter fencing styles and areas where drainage matters most.
Step 5: Brace and Let It Set
Brace the post temporarily so it does not shift while the material settles or cures.
Do not rush this step. A lot of fence problems happen because people move too quickly before posts are fully secure.
Common Fence Installation Mistakes to Avoid
Most fence installation mistakes are preventable if you slow down and pay attention during the early stages of the project.
Some of the most common mistakes include:
Not digging posts deep enough
Skipping the layout process
Failing to check level repeatedly
Rushing concrete cure times
Ignoring soil and drainage conditions
Fence posts are the foundation of the entire project. Cutting corners early usually creates bigger repairs later.
Build a Fence That Lasts
A straight, long-lasting fence starts well before panels or rails ever go up. Careful layout, proper post depth, and taking time during installation all make a major difference in how your fence looks and performs over time.
Whether you're tackling a small backyard project or fencing a larger property, using quality materials and the right tools helps the entire process go more smoothly.
At Western Fence & Landscape Supply, we help homeowners, contractors, and property owners across Boise, Meridian, Nampa, Caldwell, Kuna, Emmett, and surrounding areas find the fencing materials, tools, and guidance they need to get the job done right.
From fence posts and concrete to gravel, hardware, and fencing supplies, our team is here to help you build a fence that stays strong and straight for years to come.
Call (208) 995-6468or fill out our online contactform today to receive a free quote for your home, farm, or business. We also supply bulk orders for contractors. Let us help you transform your property with our reliable and attractive fencing solutions.